Archive for January, 2009|Monthly archive page
Gluten Free Diet Confusion Revisited
Today I got a really strange comment to my blog. And, yes, I deleted it, because I wanted to be able to comment on what I feel is an incredibly dangerous opinion in response to my GF Diet Confusion post. Here it is and below are my feelings on this post.
“These are true assumptions about gluten. But I am not going to be strictly GF simply because I CANNOT live without eating something. I am a human being. I need food. I need different kinds of food, especially those that are rich in vitamins. Bread might have bad gluten, but hey – I am unsure that I am celiac also!
Besides, I plan to stick to the best organic dark brown (or is it called black) bread that I can afford. Fortunately it has no yeast or sugar etc.
I would also like to comment on your blog about the right to share information. On my blog I have written a few articles about gluten as well as casein and candida infections. I am not a physician. In fact I am only 22. What I do is share my knowledge of the world. This is not bad in any way. I have also clearly stated that my posts reflect what I know about the world, and not what is truth actually.
People are clever – they might stumble upon my blog and learn something new. Then they read I cannot rule out grains… because I am simple and poor. I prefer to learn more about my body and its sophisticated needs. That way I can find out the truth about my own personal constitution. It is so clear – people will kinda know me as a person.
I hope you got my idea!
Namaste!”
– First of all, I’m hoping this is a native speaker of a language other than English, and perhaps that will help with some of my immediate alarm.
-Secondly, if you are CELIAC, gluten will ultimately kill you in slow and degrading ways.
-Third, gluten intolerance is currently thought to be autoimmune as well, so there’s not a good reason to risk it when there’s so much rice in the world.
I’d like to say to this person that I’ve been sick most of my life; there is not a single day that I wouldn’t give anything to have back, knowing what I know now. I’m chronically anaemic, I suffer from debilitating pain and have problems with practically every part of my digestive system because (I believe) of a diagnosis that took entirely too long. I’ve run up TENS OF THOUSANDS of dollars in medical bills (most of which I cannot ever dream of repaying); endured painful and ultimately unnecessary surgeries, treatments and degrading testing; and been treated like a loon by more medical professionals than I care to recount. I would never have had to endure a bit of it had someone known to test me for Celiac when I was much, much younger (my mother thinks around age 8… almost 21 years ago — it apparently came up, but my childhood doctor couldn’t get the testing supplies).
I’ve been denied the ability to make a decent living, I cannot get affordable medical insurance that’s worth having (I currently have a $15,000 deductable), my dreams have been destroyed by the fear that at any moment a complication could rear its ugly head. I am studying to teach Online so that I can continue to work and not be forced to live off of the meager safety nets that America has in place (but it is highly unlikely I will ever be able to hold a full time job because dealing with my complications is pretty much a full time job). I am isolated because of my embarrassment that I might have to explain my disease to someone new.
If you have a problem with gluten that is autoimmune in nature, if you’re aware of it and you choose to ignore it, you’re sentencing yourself to a life of pain, loneliness and frustration. Welcome to my world; it’s not a pretty one and not one I would wish on anyone else. I will continue to do what I can to improve the lives of Celiacs and to further the migration of verified and proven information as long as I live… with any luck, the generations of Celiacs that come after me will be diagnosed more quickly and suffer fewer of the effects of long-term exposure to gluten.
Recipe: Mutter Paneer

Mmmm... Mutter Paneer on a bed of lovely rice.
This is based on a recipe I found in a cookbook called “Vegetarian” by Fiona Biggs. Of course, as true to form, I made some changes to make it more to my liking. Enjoy! Word on the street is that you can buy Paneer already made in a package, but I’ve never seen it so I just make my own.
Paneer
Ingredients:
10 cups full fat milk
5 tblsp fresh squeezed lemon juice
Directions:
1. Put milk in a large container, non-stick would be best. Slowly bring it to a roiling boil, stirring occassionally to keep milk bits from sticking (and they will, oh God, they will).
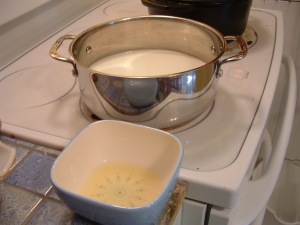
Milk and lemon juice (I only made a half recipe of Mutter Paneer)
2. When milk boils, immediately add lemon juice and remove from heat. Stir a few times until the curds and whey magically seperate. If this doesn’t happen, add more lemon juice until it does.

MAGIC!
3. Let your curds and whey stand a few minutes to cool (or risk scalding burns) and then pour through a cheesecloth. I like to put mine in a small strainer and sit it inside a collander for support, but use what you’ve got, plus the cheesecloth.

Small strainer in a collander. Put your cheesecloth inside the strainer.
4. When cheese is fully drained (this will depend on many factors, just keep an eye on it), move it to a piece of wax paper that’s too big. Fold the sides over the cheese and place a weight bigger than the cheese mass on top. Allow weight to work for at least a half hour, more is better.

This is what dry cheese should look like.

Cheese wad pressed between wax paper.
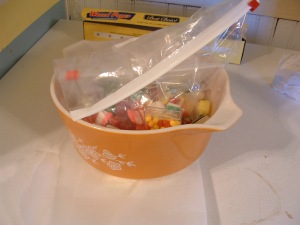
5. When cheese is cool, cut into cubes and fry in a non-stick pan. Don’t burn it! No more than 5 minutes, tops… we’re looking for brown, not black. Flip with tongs and get the other side, too. I don’t usually do the short sides, this steps is really just to keep the cheese from falling apart (and it carmelizes the cheese nicely, too).

Delicious fried cheese!! (This is pretty good all by itself, btw)
6. Remove cheese from fry pan and let cool until further notice.
Mutter Paneer
Ingredients:
4 tblsp vegetable oil
2 onions, quartered and chopped
2 garlic cloves, crushed (or minced)
1 inch piece of gingerroot, minced
1 tsp. garam masala
1 tsp. ground tumeric
1 tsp. cayenne pepper
4 cups frozen peas
8 oz. chopped tomatoes (canned are ok)
1/2 cup vegetable or chicken stock
2 tablespoons chopped cilantro
Salt and pepper to taste
Paneer from above
Directions:
1.) Heat your oil in the pan. Add onions, cook for about a minute and then add garlic. Cook these for 2 minutes or so, don’t let the garlic burn. Add your spices and garlic and let them fry for about a minute. Stir them into the onion, garlic and oil mixture until they are mixed well.
2.) Add stock and tomatoes and allow to cook until tomatoes start to darken (for fresh tomatoes). Add peas, mix well and cook until peas are warm. Add salt and pepper to taste.
3.) Add paneer, stir well. Cook until paneer is warm. Add cilantro and serve!
Method: Gluten Free Sushi Rolls

Yum! YUM YUM YUM. This picture makes me hungry. 😉
Sushi has got to be one of my favorite things to stick in my face, and one of the riskiest in my area due to a pretty major language barrier. When we’ve gone out for sushi, it seems like the sushi chefs always like to substitute something when you ask to leave something else out (and it almost always has got gluten!). So, I only have sushi at home now… and man, it’s a money saver!!!!!!!
I read this sushi book by Kimiko Barber and Hiroki Takemura and it influenced me a great deal. I also learned a lot from watching people at sushi bars make sushi… so my methods aren’t really what you would call “authentic” but they are certainly tasty! 🙂
Sushi rice is the first thing you have to do, always. Here’s my sushi rice recipe, it will make about 6 rolls:
Ingredients (Part 1):
1 1/2 cups sushi rice (this is a short grain sticky rice, so make sure you get the real deal)
2 cups hot water
salt, to taste
4 tblsp. sugar
1 tsp. salt
1/4 cup sweet rice cooking wine
1/4 cup unflavored rice vinegar
Directions (Part 1):
1) In your rice cooker, add rice and hot water and some salt. Let it cook your rice while you do the next step. If you don’t have a rice cooker, well, you’re on your own. 😉 We eat so much rice here that we have a rice cooker to simplify things… if you’re Celiac, it would be a good idea to invest in a decent one. Mine has fuzzy logic, so even if I do something stupid, the rice generally comes out good.

Only use real sushi rice... it will make your life easier!

My friend, the rice cooker.
2) In a small saucepan, combine last four ingredients. Cook over medium heat until the liquid turns clear. DON’T LET IT BOIL! Remove from heat and let cool while you wait for your rice.

Be sure to stir this to dissolve the particles.
3) Here’s where we depart largely from tradition. Find a large metal bowl and dump your rice in it (once it’s cooked). Be careful, that bowl is getting ready to get HOT! Using a rice paddle, mix in the vinegar mix that you made and cooled on the stove (remember it?). Allow the mixture to sit on the counter for a half hour or so, then give it another good stir.

Cooked, but unseasoned sushi rice in a metal bowl. That white thing is a rice paddle, it helps a lot!
You should notice that the rice is sucking up the excess liquid. Let the rice cool a total of about 90 minutes, stirring every 15-30 minutes until the liquid is incorporated and rice is cool enough to handle. The metal bowl will speed cooling, making the traditional fanning unnecessary, in my opinion. This is the lazy way, it cools whether or not I’m even in the house.

Finished sushi rice, all shiny and sticky.
Ingredients (Part 2):
Nori
Rice Vinegar
Water
Sushi Rice from Part 1
Gari (pink pickled ginger)
Wasabi (optional, but delicious)
Assorted veggies, cheese and meat
Directions: (Part 2):
Ok , this is where we start to get technical. It’s sort of hard to explain how to do this, but once you’ve done it a few times, it will make more sense.
1) While your sushi rice is cooling is a great time to lob up whatever veggies, cheese or meat you intend to use in your rolls. My top three favorites are avacado, cream cheese and smoked salmon. Other great sushi fodder includes celery, green onion, dill pickles, carrots, radish, daikon, fried tofu… really anything you can chop into long skinny pieces. You can do this same day or the day before… just be sure to practice safe food storage. I don’t recommend raw fish, though we’ve done it before. I’ve had sushi with fried chicken, which was delicious (but I’ve not done at home).

My sushi cut veggies. I always keep them seperate from meats and cheeses.

Meat and cheese plate. Cream cheese on the left, smoked salmon on the right. This is only safe because the fish is cooked.
2) Next, set up your sushi stations. You will need a rolling area where all your ingredients are within easy reach (veggies, cheese, meat, rice and any condiments you want to put in the roll, like sriracha or wasabi mayo and your nori). It should also have your bamboo mat and a bowl of warm water with vinegar big enough to put your hand in. Your other area should have a cutting surface (large cutting board is good), a long, thin, sharp knife, pickled ginger, wasabi and your plates.
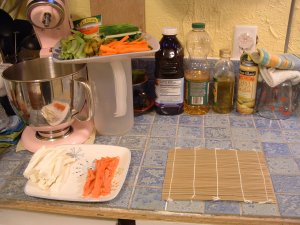
This is my rolling area. The rice (not shown) is on the right hand side, along with the vinegar bowl (not shown)..
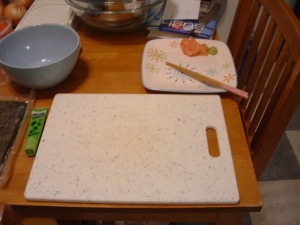
This is my finishing area. Knife is not pictured, but you'll see it. The blue bowl is just there to get it off of the counter.
3) In your rolling area, lay out your bamboo mat, shiny side up (you absolutely need this device, it’s like ten bucks at an Asian grocery). Place an uncut sheet of nori shiny side down on the bamboo mat. Dip your hands in the vinegar water and grab and large handful of rice. Spread it thinly over about 1/3 of the nori sheet, leaving a half inch or so on one side (see photo).

Nori on bamboo mat. I use it shiny side down so that the rice can grab at the bumpier texture on the top side. It makes sense to me this way.

Spread your rice on 1/3 to 1/2 of the Nori sheet, don't get too crazy, though, or it won't roll well.
4) Add your fillings and any condiments you want inside the roll. I usually try to limit myself to 3 fillings, it makes rolling easier.
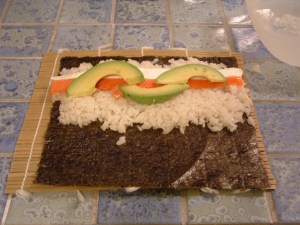
Make sure to keep your fillings in the middle of your rice. It will roll easier and look better. 🙂
5) Now here’s where it gets tricky. Wet both ends of the exposed nori sheet. With the fillings on the side closest to you, fold the bamboo mat and ingredients over on themselves, pulling the mat toward you as you do. If a little squishes out the short sides of the roll, it’s ok; you shouldn’t have any squish out the long sides, though. When you’ve pulled the roll as tight as you think it will go (only practice will help you judge that), use the mat to maintain pressure and finish rolling the roll. Press the wet strip of the nori against the roll to seal.

I always turn my mat so that my ingredients are closest to me before I start to roll.

Hopefully this illustrates the rolling method. Be sure to keep steady pressure as you roll or you'll have to do it again.
6) Move your roll to the finishing area and place it sean-side down on the cutting board. Start by cutting your roll in half, then cut each half into half and so on, until you have made bite size pieces (I usually go for about 3/4 inch slices). The ends will always be odd sized and not evenly filled… even at sushi bars I’ve gotten them this way. Plate your sushi, add some gari and wasabi and a little dish for soy sauce. If you want to be really fancy, a drop of condiment on the top of each slice is a nice touch. If you keep your knife blade clean and warm (warm water rinse), your cuts will tend to be better. Use one hand to stabilize the roll. Try a gentle sawing motion intead of a straight slice and use an unserrated knife with a long, sharp, thin blade (I use a utility/filet knife).

Don't be discouraged if yours don't come out this nice the first time, I've been making sushi for years and I still make a mess of it half the time. 🙂
Above all else, have fun. Don’t forget that even though this is a traditional food from a land steeped in tradition, there is always room for innovation and just making it the way you like it. The best cooking is all about keeping the best parts of tradition and mixing them with the best parts of innovation.
Recipe: Blackeyed Peas and Chard
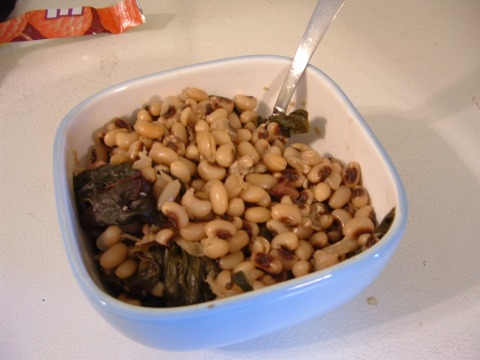
Blackeyed Peas and Chard. YUM!
My grandmother, who was from the Deep South, used to make the best blackeyed peas. I could never figure out what was in them, but I think I got pretty close this time. In my part of the world, it’s considered good luck to have a meal of blackeyed peas on New Year’s Day.
Ingredients:
1 lb. dried blackeyed peas
5 tblsp. brown sugar
1 1/2 cup pineapple juice
2 ounces ham cubes
4 1/2 cups water
1 tblsp salt
1 tsp. soy sauce
1 tblsp granulated garlic
1 tsp. paprika
1 bunch swiss chard (or other dark greens), cleaned and torn in medium pieces
Directions:
1) Put everything but the chard into a 5 qt. dutch oven and simmer with the lid on. After 1/2 hour, add chard (put lid back on) and simmer another hour. Kill the heat and eat, baby. Be sure to mix your greens into the peas! Drain any excess liquid before refrigerating, though feel free to leave a little.
Recipe: Gluten-free Macaroons

These are the chocolate macaroons. Recipes for vanilla and chocolate follow.
For some reason I didn’t get a lot of good photos of these… I must have been too excited to get ‘er done. These are really easy, and according to my friend Nathan, the best macaroons he’s ever put in his face (he’s not gluten free, by the way). These were modified from a recipe I found in a Better Homes and Gardens cookbook.
Ingredients:
5 1/3 cups sweetened flaked coconut
1 1/3 cups granulated sugar
1/3 cup coconut flour
1/3 cup potato starch
1 tsp. xanthan gum
1/2 tsp. salt
8 egg whites
1 tsp. almond extract
1) Preheat your oven to 325 degrees.
2) In the bowl of your stand mixer, combine sugar, flour, starch, gum, coconut, salt and extract. Add egg whites, one at a time and fully integrate before adding the next. I used a scoop with a 1 1/2 inch diameter to scoop and pack my macaroons, but you could use anything, even a kitchen spoon, if you don’t care about making them really round.
3) To use the scoop method, use a spatula to get all the batter on the bottom of your workbowl, then scoop from the bottom to the top of the bowl, compressing as you go. There should be a little bit of batter oozing out (not a lot!). Push your scoop against your ungreased cookie sheet as you scoop and that will help keep the shape. This will take some practice. I’ve also seen people pipe them, but I’ve never tried it.
4) Bake in your oven for 20-25 minutes, or until they start to brown on the top. Allow them to sit on the sheets for 5-10 minutes to set up and then move to a cooling rack until fully cooled.
*** To make chocolate macaroons, add 1/4 cup of dutch process cocoa and 2 tblsp. of the liquid from marascino cherries to the batter before the egg whites (it will be a little bit stickier, but won’t make a huge difference). I topped mine with marascino cherry halves before I baked them. The picture shows one batch of 1 1/2 inch macaroons. ***
Method: Brined Turkey Breast

Delicious, tender, moist gluten-free turkey
Here at Ye Olde Gluten Free Blogge, the holidays are always killer. We’re busier than ever and have less and less time to get more and more things accomplished. Now that they are over, I’m posting some of my better finds/creations. I hope you enjoy! 🙂
For the most moist turkey you’ve ever had in your life, a brine is necessary. On Good Eats, Alton Brown discusses what a brine actually does: when the salt in the brine starts to permiate the turkey in order to balance osmotic pressure, it takes other stuff in with it, like liquid and flavor. Here’s how I do it.
Ingredients (Part 1):
1 turkey breast, bone-in (7-10 lbs)
1 lb. table salt
1 lb. brown sugar
water (a whole lot!)
Directions (Part 1):
1) After thawing your turkey breast (or buying fresh), remove the bags from the cavity and toss them in the trash can.
2) In bowl, bucket or sink large enough to submerge turkey breast, put salt and sugar. Fill about 1/2 way with cool water and stir until salt and sugar are mostly dissolved. Put in turkey, meat down (or however it will fit best, but be sure the meat is submerged) and fill the rest of the way with water. Try very, very hard to cover the breast. However, if it can’t be done, be sure that the meat part is submerged. The side with the cavity is mostly skin and nasty, so it’s not the end of the world if it sticks out a bit.
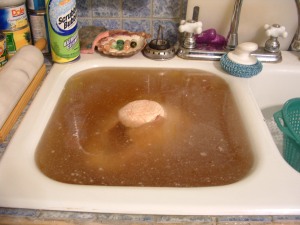
This is my raw turkey, meat submerged.
3) Allow to brine about 6 hours. Much longer and you risk the cold water getting too warm. It will be plenty long, I promise. If you have a cat who has a bad habit of trying to steal meat twice his size, be sure to put a heavy pot lid on top or be prepared to watch your brine!!!!

If your cat is eyeing your turkey, you may be in trouble!!! Safely on his favorite perch, Gaius is trying to figure out how to wrestle this turkey breast from the sink...
Ingredients (Part 2):
1 or 2 onions, cut into wedges
2-4 apples, mixed varieties, cut into wedges
3-4 tangerines, wedged and skin-on
3-5 ribs of celery, trimmed to fit in and around turkey
peppercorns, to taste
granulated garlic, to taste
fresh rosemary, to taste
fresh thyme, to taste
1 cup warm water
high smoke point oil (corn, canola, peanut, etc… whatever you’d use for deep frying)
Directions (Part 2):
1) Remove turkey breast from brine, turn cavity down and allow to drain, 5-10 minutes. Preheat oven to 325 degrees F.
2) Pour 1 cup warm water into a 12-inch cast iron skillet (please use cast iron, you’ll thank me later). Place turkey breast cavity up (meat down) in the skillet. Stuff about half of your veggies, fruits and seasonings into the cavity (do the best you can). Layer the rest around the turkey in the skillet. It really will all fit. Rub all your exposed breast parts with your oil. Poke an oven-safe thermometer into the center of the deepest part of your turkey, taking care not to touch the bone (it will throw off your reading). Tent with foil to prevent burning (not shown) and slide into oven.

Here's my turkey breast, dressed up for it's date with the oven.
3) When thermometer hits about 150 degrees F, remove turkey breast from oven. Allow to rest for at least a half hour (carry-over will continue to cook the breast for a little bit and make sure it gets to a safe 160 degrees F).

I like to double-check my thermometer to be sure that my turkey is safe.
4) After turkey breast has rested, remove to a large cutting board (preferably over the sink to contain the mess) and carve. I always pull off the skin and toss it into a LARGE stock pot and do the same with any meat I don’t like the looks of and, of course, the carcass.

Carcass in a stock pot.
5) Put about a cup of water into the stock pot, clamp a lid on and let it simmer for 2-4 hours or until the bones are thin and break easily. Strain out the bones and skin and things, let cool and store in freezer for delicious turkey stock.
6) While you’re doing the stock, you might as well take that cast iron skillet full of turkey juice and goodies and put it over medium heat. Simmer it down until the veggies and fruits practically turn to mush. Strain them out and put the juice back on the stove. Salt if needed and thicken with a little corn starch or flour. This makes excellent turkey gravy!!!!!!

Turkey gravy fodder.
Gluten Free Diet Confusion
Ok, people. What’s the deal? While I’ve been researching and designing new recipes to make our gluten free lives a little easier, apparently others are perpetuating bad information on gluten free diets.
So, here we go, a response to the biggest bits of bad info I’ve seen so far.
1) Gluten is found in all sorts of foods, including rice. WRONG!!!! Gluten in the sense of the gluten-free diet is found in wheat, rye and barley (and their hybrid relatives) and sometimes oats, believed to be due to cross-contamination.
2) Gluten-free diet is so much healthier than eating gluten because it’s evil. NO! Gluten isn’t evil unless you can’t eat it for medical reasons. In America, wheat is a fortified grain… our food producers add extra vitamins, minerals and trace elements. It’s good for you. It really is. I know few better grains than whole wheat.
3) There’s hidden gluten everywhere, even in rice! NO! Plain rice made of rice has no gluten in the sense that we’re talking about. Fruits, veggies, greens, etc., are naturally gluten free. Other products frequently disclose gluten sources on their products, through their 1-800 numbers and/or on their websites. If you bother to look, you can find lots and lots of great products that are gluten free (even Wal-Mart’s store brand has tons of gluten free options).
4) I can detox my body by eliminating gluten for a short time period. WRONG!!! Tell Oprah to stick it. Gluten-free is a LIFELONG MEDICAL DIET. Unless you’re undiagnosed and gluten intolerant, eliminating gluten is not going to fix whatever eating habits got you to the place where you thought you’d need to detox.
5) I should go gluten-free without being tested first. !! Please don’t!!! There are lots of good reasons to be tested, including keeping you on the straight and narrow and being able to demonstrate to family members why they should also be tested (you might save your mother’s life). Also, your doctor should be able to help diagnose other problems that are likely to come hand in hand with the gluten intolerance; it rarely travels alone.
6) A little gluten won’t hurt me… YES IT WILL!! Even a little bit of gluten can cause intestinal damage in people with Celiac disease. Don’t eat it, gluten kills us.
7) I have to stop eating pizzas, pies, pastries, cookies, etc…. No, never!! There are many of us out there who are interested in baking (and probably had lots of wheat baking miles under our belts) who are developing and refining recipes to fit our ideas of what real food should taste like, gluten free or not. My friends and family (and new friends who once were strangers) frequently are unable to tell the difference in my homemade baked goods (and sometimes even prefer the gf versions to the wheat originals). The only thing I have yet to be able to replicate (or know others who have) is phyllo dough… and I’m sure someone will figure that one out in the next few years. 🙂
So, I hope that clears up some of the confusion. Gluten-free is not a fad diet, it’s not a New Year’s Resolution, it’s not a game. People who are on Gluten-free diets are on them for strict medical reasons… primarily Celiac Disease. Celiacs cannot stray and must ALWAYS be careful about ingesting gluten because it sets off an autoimmune chain reaction that always ends in a sad and dangerous way.
Oh yeah, and just because you have a blog doesn’t give you permission to perpetuate bad information. If you are irresponsible enough to carry bad information that’s neither properly researched nor entirely true, you could literally be hurting people when it comes to the whole gluten free bit. Don’t be irresponsible… if you have some sort of know-it-all complex, then you can stick it, too. People need good information, this isn’t an easy diet in the beginning (it does get easier, I promise).
 Comments (2)